
For awhile now I have been meaning to evaluate Nomad and Consul for managing servers as well as batch jobs. It has lots of features that are attractive and would make managing services very easy using the Consul service mesh and health checks. One of the downsides is that it takes some configuration and setup to get it configured for maximum success, with multiple copies of the Nomad Server and Consul Server running in each datacenter. The other side of the coin is other solutions require setting up an external database that will then have to be managed and monitored.
In this example, three servers will be setup in each pretend datacenter known as dc1 and dc2.
But before deploying something this fundamental of an architecture change it needs to be tested, which is where FreeBSD Jails come in. It is trivial to spin up many, many jails very quickly.
Setting up the Jails
To create six Jails to run the Consul and Nomad servers, six IP addresses will be needed:
for i in `jot 6 1`; do echo $i; ifconfig vtnet0 192.168.1.7$i alias; done
Create jails for each of these addresses, using ezjail:
ezjail-admin create nomad00 192.168.1.71
ezjail-admin create nomad01 192.168.1.72
ezjail-admin create nomad02 192.168.1.73
ezjail-admin create nomad10 192.168.1.74
ezjail-admin create nomad11 192.168.1.75
ezjail-admin create nomad12 192.168.1.76
Note that the first three of the Jails start with nomad0X and the last three start with nomad1X. This is to signify that the first three jails are part of dc1 and the last three are part of dc2.
Next install Consul and Nomad in all the jails using a nested for loop:
for j in `jot 2 1`; do for i in `jot 3 0`; do echo nomad$j$i; jexec nomad$j$i pkg install -y consul nomad; done; done
Setting up the Consul Servers
Once they are installed, Consul should be configured first so that Nomad can leverage Consul for configuring itself automatically.
Consul requires very little configuration, mostly just in rc.conf:
consul_enable="YES"
consul_syslog_output_enable="YES"
Then on the dc1 hosts, use the following which specifies the datacenter to join, the other local Consul instances and one of the remote instances.
consul_args="-server -ui -bootstrap-expect=3 -datacenter dc1 -retry-join-wan 192.168.1.75 -retry-join 192.168.1.71 -retry-join 192.168.1.72 -retry-join 192.168.1.73"
On the dc2 hosts, a similar configuration specifying dc2 as the datacenter and the opposite IPs:
consul_args="-server -ui -bootstrap-expect=3 -datacenter dc2 -retry-join-wan 192.168.1.71 -retry-join 192.168.1.75 -retry-join 192.168.1.76 -retry-join 192.168.1.77"
Then startup Consul:
service consul start
By default the web UI is turned off, but in this case we have enabled it
by passing the -ui in the consul_args in each Jail.
The web UI can be found by browsing to any of the host IPs on port 8500.
Opening http://192.168.1.71:8500/ui should look like this:
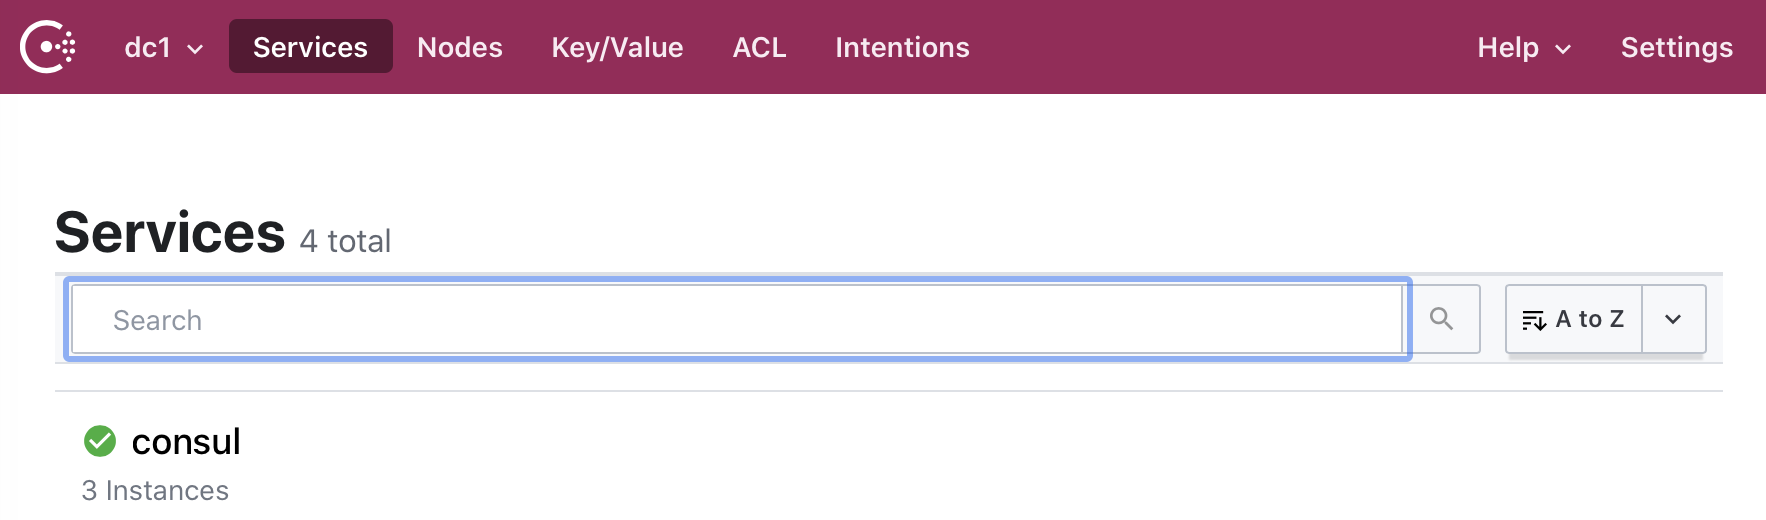
Note that it only lists 3 instances because it is only showing dc1.
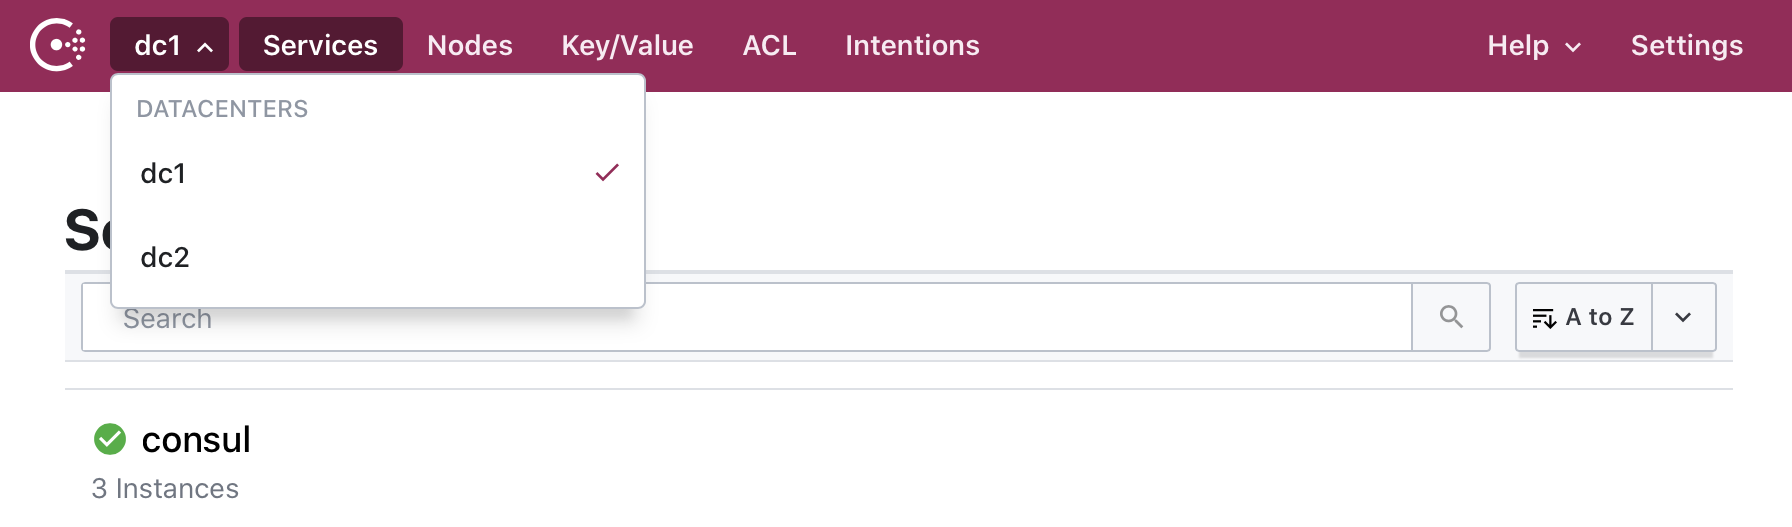
The Datacenter can be changed by clicking the drop down int the top navigation bar:
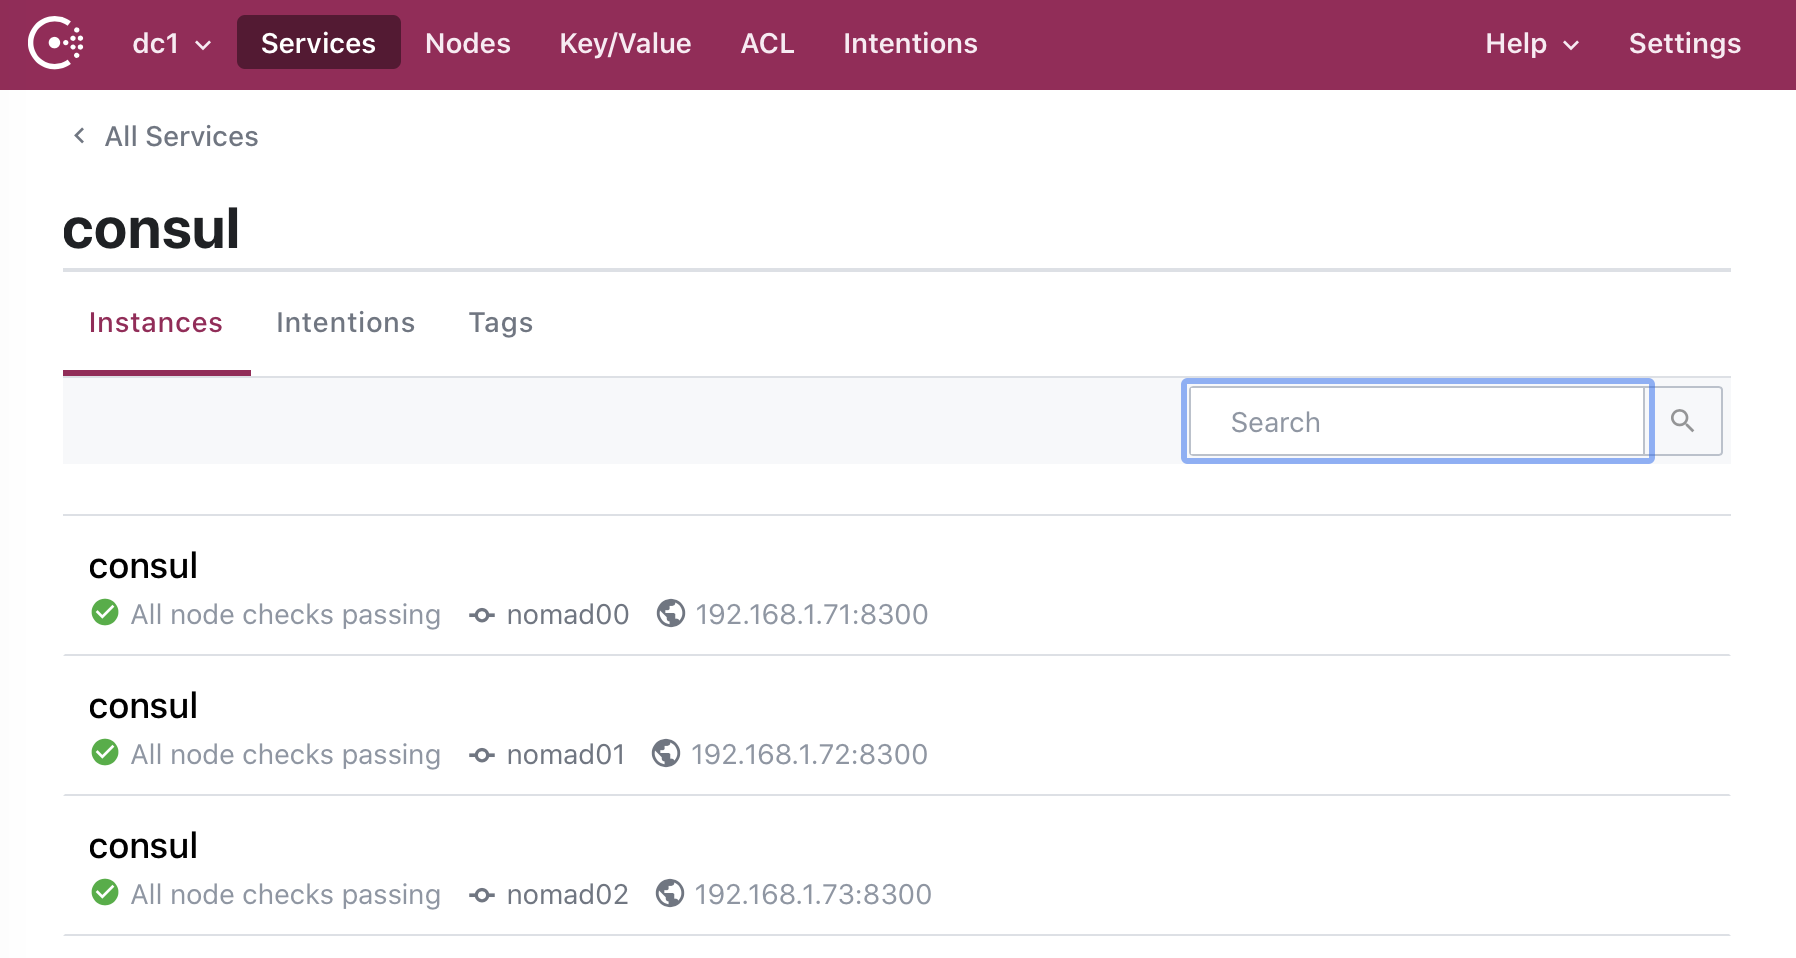
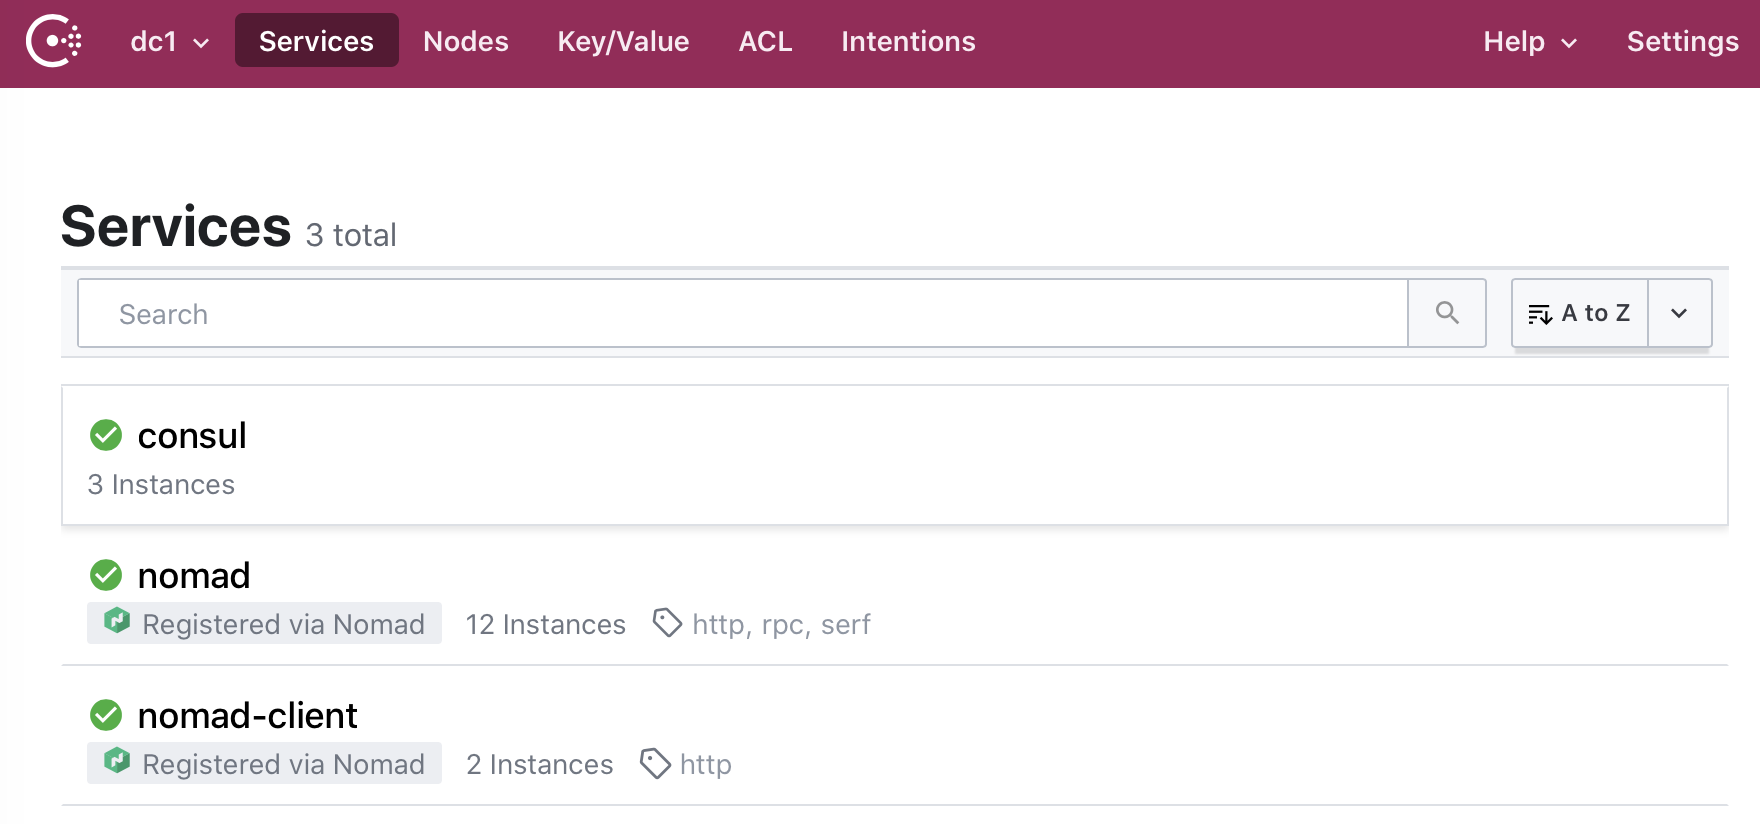
By clicking on the Consul service below the navigation bar we can see each instance is healthy and the Jail and IP of the Consul server:
Setting up the Nomad servers
Configuring the Nomad servers is pretty similar to setting up Consul, but in this case we will have a config file to manage as well.
For all of the Jails we will add the following to rc.conf:
nomad_enable="YES"
nomad_debug="YES"
For the dc1 nodes, i.e. nomad00 - nomad02, add the following to rc.conf:
nomad_args="-config /usr/local/etc/nomad -network-interface vtnet0 -dc dc1"
For the dc2 nodes, i.e. nomad10 - nomad12, add the following to rc.conf:
nomad_args="-config /usr/local/etc/nomad -network-interface vtnet0 -dc dc2"
On each host, remove the /usr/local/etc/nomad/client.hcl file so that
there is no confusion about if this is a Nomad server or agent.
Update the /usr/local/etc/nomad/server.hcl file to look like this:
data_dir = "/var/lib/nomad"

advertise {
  # This should be the IP of THIS MACHINE and must be routable by every node
  # in your cluster
  #rpc =
}

server {
  enabled          = true
  bootstrap_expect = 3
}
Note that in this case we are not telling Nomad how to find the other Nomad servers, this is because Nomad automatically will check for a local Consul instance and if found use that to communicate and advertise itself to the other Nomad servers.
Start the Nomad servers:
service nomad start
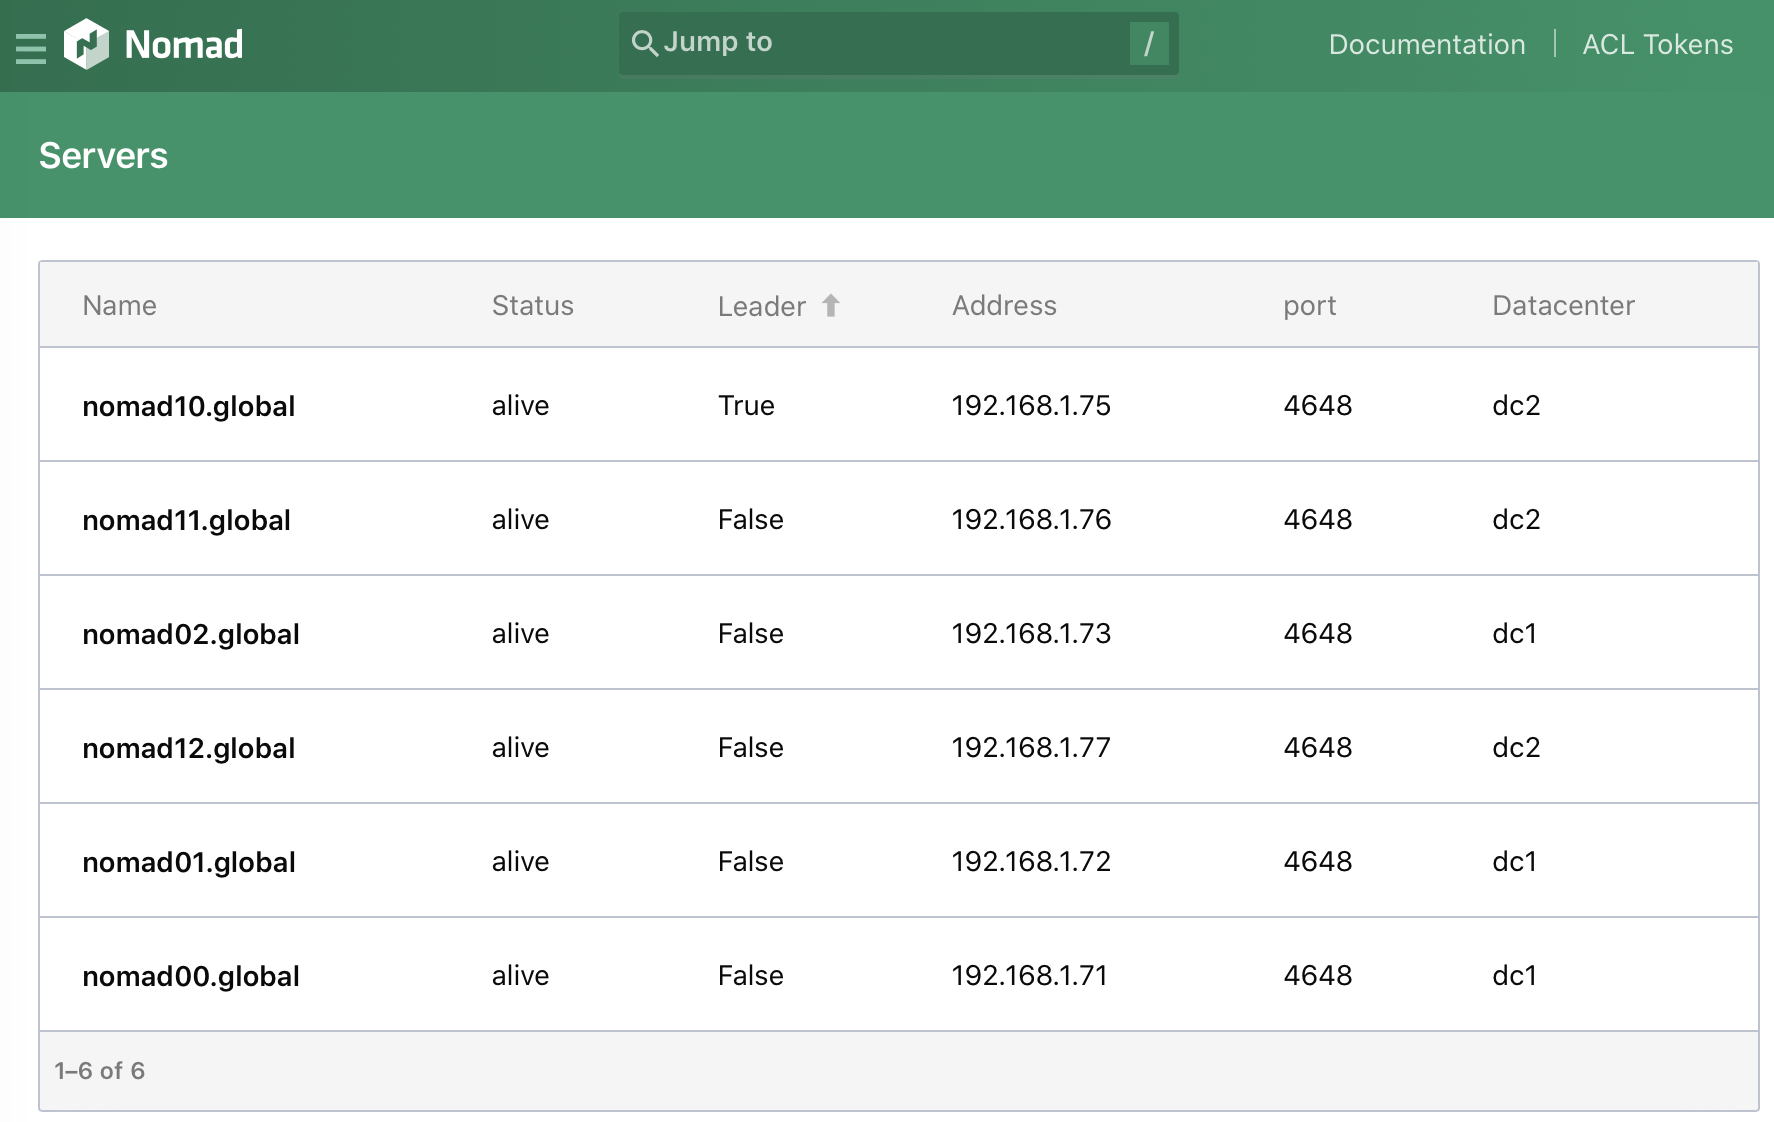
The Nomad web UI can be accessed by browsing to any of the IPs on port 4646. For example: http://192.168.1.71:4646/ui/.
Navigating to the Servers section will show something like this:
Setting up DNSMasq
DNSMasq is handy to point the local .consul top-level domain into the
Consul servers, which listen on port 8600 for DNS queries.
Add the following line to /usr/local/etc/dnsmasq.conf:
server=/consul/192.168.1.73#8600
And enable DNSMasq by adding the following to rc.conf:
dnsmasq_enable="YES"
Start DNSMasq:
service dnsmasq start
Then update resolv.conf to point to the DNSMasq instance in each of the jails.
Setup the agent Jails
Configure two more jails in each site to run jobs on.
Four more IP addresses will be needed:
for i in `jot 4 0`; do echo $i; ifconfig vtnet0 192.168.1.8$i alias; done
Then spin up four more jails:
for i in `jot 4 0`; do echo agent$i; ezjail-admin create agent$i 192.168.1.8$i; done
And install Consul and Nomad in each jail:
for i in `jot 4 0`; do echo agent$i; jexec agent$i pkg install -y consul nomad; done
Configure the resolv.conf in each agent jail to point to the DNSMasq instance.
Configure the Consul Agents
Configure rc.conf in each agent:
consul_enable="YES"
consul_syslog_output_enable="YES"
For the first two agents, agent0 and agent1, configure them to be part of dc1:
consul_args="-datacenter dc1 -retry-join consul.service.dc1.consul"
For agent2 and agent3 configure them to be part of dc2:
consul_args="-datacenter dc2 -retry-join consul.service.dc2.consul"
Notice how the -retry-join flag is pointed to a DNS record in the
.consul top level domain. This tells Consul to register with the
Consul instances that are part of that service mesh.
To visualize this, run the following command:
host consul.service.dc1.consul
It should look something like this:
root@agent0:/ # host consul.service.dc1.consul
consul.service.dc1.consul has address 192.168.1.72
consul.service.dc1.consul has address 192.168.1.71
consul.service.dc1.consul has address 192.168.1.73
Then start consul on all of the agents:
for i in `jot 4 0`; do echo agent$i; jexec agent$i service consul start; done
Check the Consul web interface again and now the agents will be listed under the Nodes tab:
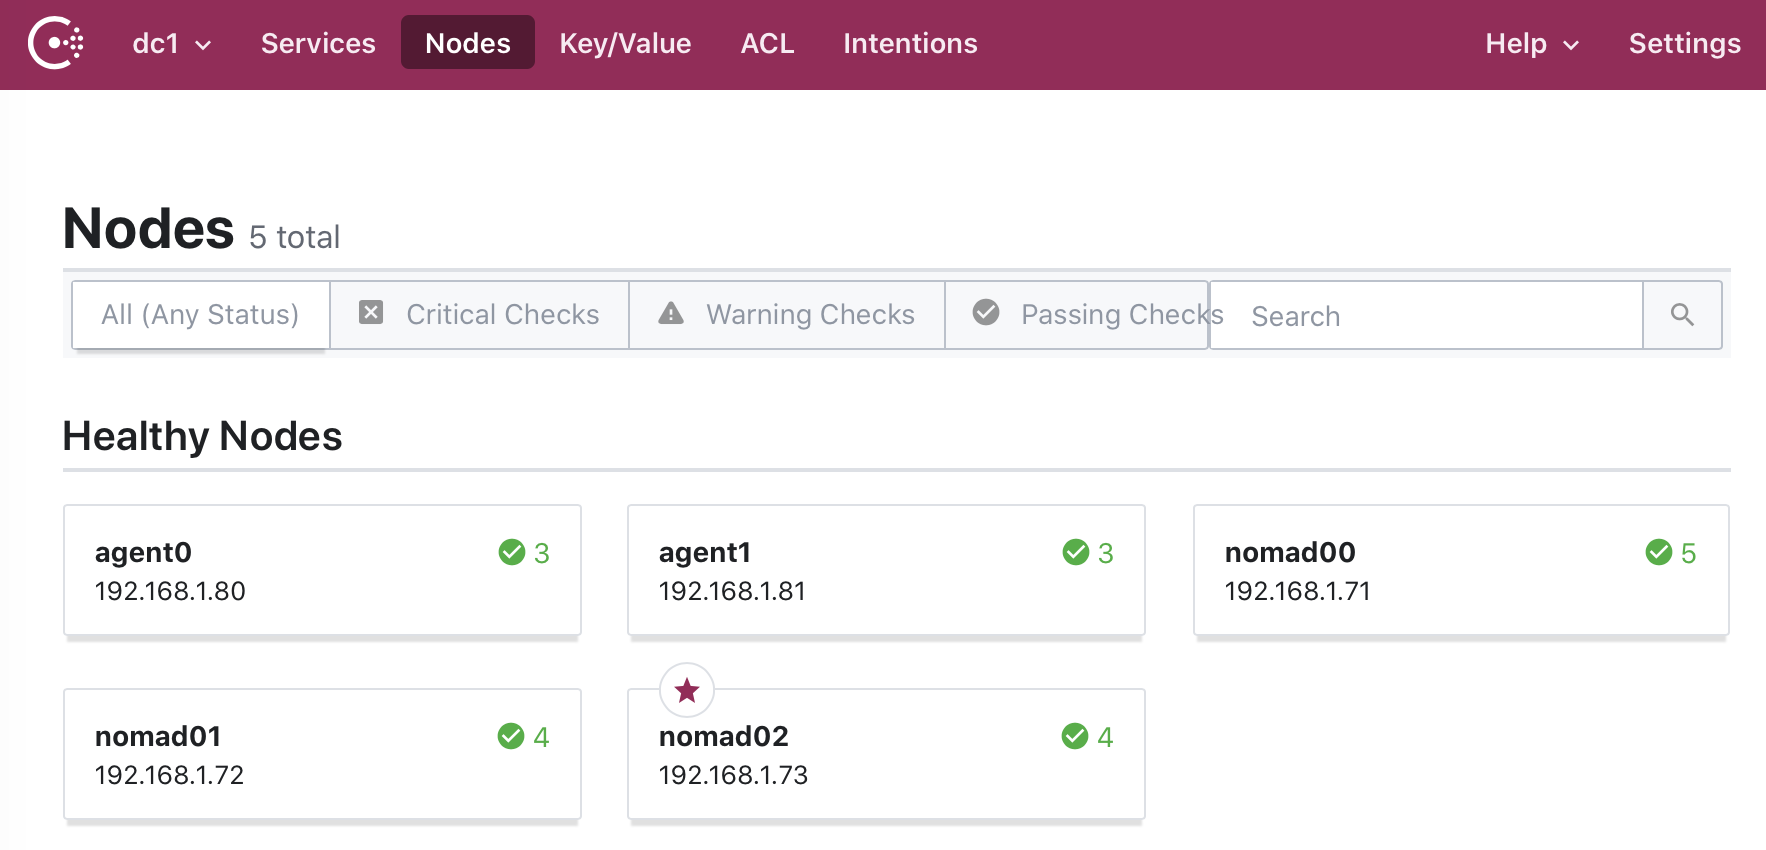
As before, note that this shows all Consul servers and agents for dc1. To see the dc2 servers and agents, in the left of the top navigation bar click on dc1 to list all the datacenters.
Configuring the Nomad Agents
Configure rc.conf on each agent:
nomad_enable="YES"
nomad_debug="YES"
nomad_user="root"
Note that the nomad user in this case will be root. This will allow the agents to do things like install packages.
To configure the dc1 agents, agent0 and agent1, add the following to rc.conf:
nomad_args="-config /usr/local/etc/nomad -network-interface vtnet0 -dc dc1"
To configure the dc2 agents, agent2 and agent3, add the following to rc. conf:
nomad_args="-config /usr/local/etc/nomad -network-interface vtnet0 -dc dc2"
Then remove /usr/local/etc/nomad/server.hcl.
Modify /usr/local/etc/nomad/client.hcl to contain:
data_dir = "/var/lib/nomad/"

client {
  enabled = true
}
Note that the Nomad clients have not been configured to point to a Nomad server. This is because the Consul agent in the Jail provides the information to configure the Nomad client.
Start the Nomad client on all of the agent jails:
for i in `jot 4 0`; do echo agent$i; jexec agent$i service nomad start; done
Once the agents have started the Consul web UI will update to show them:
And the Nomad web UI will show the agents under the Clients section:

Conclusion
In the next article we can explore how to use Nomad jobs to deploy all manner of services.